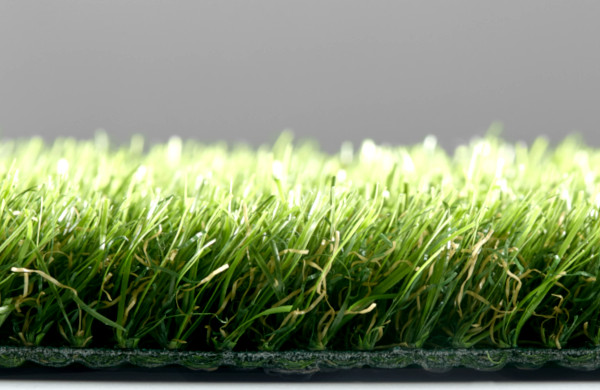
 Value Grass
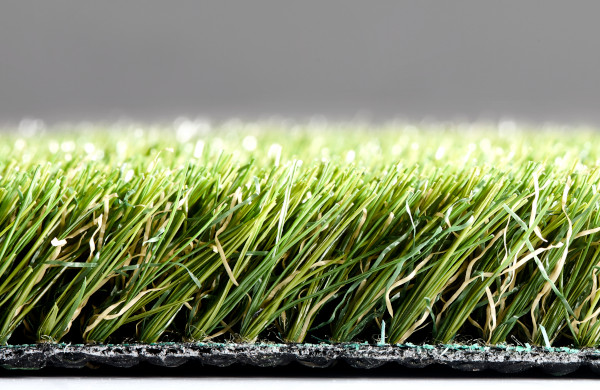 Premium Grass
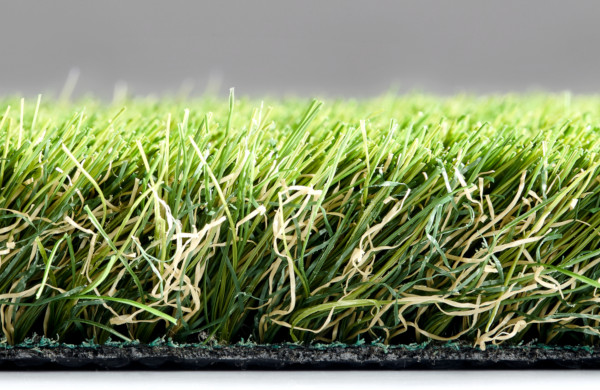 Elite Grass
Sign Up to Get Our Newsletter & Get 10% Discount
0161 989 0525
Toggle Nav

Trending Searches:
- artificial
- of range
- artificial grass
- grass
- the
- artificial grass garden
- ass
- artificial grass value
- artificial value
- artificial grass grass
- di range
- ch range
- artificial garden
- gh range
- sh backing
- gr range
- ud backing
- bl backing
- Price of grass
- ca backing
- he range
- io backing
- po range
- ci range
- ul backing
- ss backing
- mi backing
- st backing
- ac backing
- an backing
- me backing
- rt range
- sh range
- di backing
- ch backing
- ol backing
- he backing
- ht backing
- ge backing
- tr backing
- rt backing
- oi range
- h q
- ge range
- ny range
- premium range
- ud range
- tr range
- um range
- ro range
- ea range
- ll backing
- mm backing
- artificial grass grass garden
- in backing
- ti backing
- pe backing
- id backing
- artificial grass elit
- ho backing
- install
- w backing
- ia range
- off
- oo range
- ga range
- em backing
- pr backing
- se backing
- v range
- us range
- value range
- el backing
- ye range
- ve range
- v backing
- se range
- us backing
- iv backing
- iv range
- dg range
- ve backing
- en backing
- ol range
- va backing
- dg backing
- ll range
- it range
- va range
- iu backing
- do range
- yo backing
- at range
- mo range
- ad range
- ab range
- is backing
- we backing
- ux backing
- ea backing
Search
-
Free UK Delivery
-
5 Star Reviews
-
Lowest Price Guarantee
-
No Quibble Returns
Garden Install Guide

Step 1: Measure Out
The first step to installing is to calculate how much grass you need. We'd recommend appoximately 0.2m overlap at each edge.
For a detailed guide please see our measuring guide.

Step 2: Remove the old lawn
Remove the old grass and excavate down to a depth of approximately 50mm - this can be completed with a spade or a turf cutter may save time for larger areas. Ensure the excavated area is level.

Step 3: Install a border
A border is optional, but is recommended for a secure and professional finish. The border contains the aggregate subbase and also provides a secure surface to secure the artificial grass too. Tanalised 2" x 2" timber is a good choice for straight edges and gradual curves.

Step 4: Lay the subbase
A subbase allows stable footing for your new lawn and also aids drainage. We would recommend using MOT (hardcore) to a depth of around 40mm.
The subbase should be compacted with a wacker plate (ideally), a roller or the back of a heavy spade. Wacker plates are widely available from tool hire business at reasonable prices.

Step 5: Lay the base
For a smooth and flat base, sharp sand should be layed to a depth of around 25mm. Compact the sand once laid with a wacker plate, roller or the back of a heavy spade.
After compacting, ensure that the surface is level. At this point the surface should be flush with the border.

Step 6: Lay the geo-textile barrier
To ensure that natural vegitation does not penetrate your new lawn, a geo-textile weed barrier should be installed. We'd recommend ensuring that the barrier fully covers the area, including the borders. If more than one length is required, we suggest you overlap the join by about 0.2m. If required, you can pin the geo-textile down using small nails into the border.

Step 7: Lay the grass
Lay the artificial grass ensuring the turf fully covers the area, ideally with some overlap at the edges. If more than one length of grass has been used then butt up adjacent lengths.
At the end of this step we would recommend leaving allowing the grass 24 hours to settle.

Step 8: Cut the grass to size
Use a sharp knife to cut the grass to size.
If any joins are required be careful that you dont alter the grass position during the cutting process.

Step 9: Join grass (if required)
If required, use joing tape and joining adhesive to secure lengths of grass together.
Fold back the edge of each length of grass and lay joining tape. Apply joining adhesive to the tape and then carefully unfold the artificial grass and press it down onto the adhesive.

Step 10: Secure the grass to the border
Use galvanised artificial grass nails to secure the edge of the turf into the border.

Step 11: Finishing touches
Brush the grass against the pile direction - this will lift the pile (which will have been compacted during storage).
Sit back and enjoy your new lawn.